When you purchase through links on our site, we may earn an affiliate commission. Here’s how it works.

Now that winter is fast approaching, you could benefit from learning how to winterize a sprinkler system. This is especially the case if your yard is subject to frost, and any sitting water can freeze and burst the pipes, resulting in costly repairs. In fact, it’s one of the things you should do to get your home ready for fall, but it falls off the list for many of us.
If you haven’t already taken care of this, you need to do so now. The good news is that, with the right equipment and methods, you can drain the sprinkler system and prepare it for winter yourself — no professional needed. Here, we breakdown exactly what you need to do to winterize a sprinkler system.
It's also a good time to winterize your pipes and get the ready before the cold weather hits.
If you’re not comfortable handling any of the following steps, then of course you should still call in a professional. Just don’t leave this chore unfinished — a professional will be much cheaper than repairing the system!
You should also check your manual for direct guidance. Most will follow the below steps, but you should always double-check the specifics in case you risk voiding the warranty.
Air compressor (optional)
Insulation foam or tape
1. Shut off the water — First, switch off the water supply to the system. This is usually via a main valve near your water meter. If your system has backflow preventing valves, then those need to be shut off too.
Get instant access to breaking news, the hottest reviews, great deals and helpful tips.
By submitting your information you agree to the Terms & Conditions and Privacy Policy and are aged 16 or over.
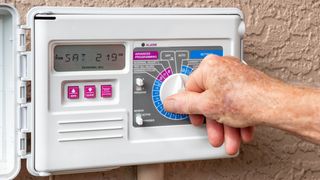
2. Switch off your timer — If your system comes with an automatic timer, then switch it to rain mode. That way you can shut it down and save your settings ready for the spring. If you don’t have a rain mode, then switch it off completely.

3. Drain the remaining water — Now it’s time to remove any residual water from the pipes. This is the tricky part, but once you know what you’re doing, it’s fairly straightforward. There are three ways to drain the water: manually, automatically or blowing it out via an air compressor.
This is a straightforward method. Essentially, the pipes are elevated so that they manually drain when you release a valve at the lowest point — this could be at the end of the pipes. Wearing goggles to protect your eyes, slowly release each valve to let the water drain until empty. Close them again once finished.
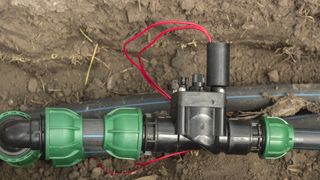
Some sprinkler systems can automatically drain, which is very useful. All you need to do is turn on the sprinklers while the water is shut off. This will drain the majority, but some residual water will still remain in the valves. To drain what's left, you need to loosen the solenoid on every valve (it looks like a couple of wire cables looped out of a plastic cap). Tighten these again once the water is completely drained.

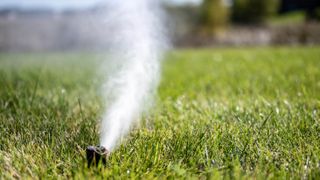
This is the most complicated and time-consuming draining method. You essentially force compressed air into the system, blowing out any excess water through the sprinkler heads.
This can be a dangerous method though, which can potentially damage the system as well as yourself if not performed correctly with the proper safety equipment. Not every sprinkler system is designed to handle this amount of pressure either, so the manual should also be consulted. If you’re not comfortable doing this, or are unsure in any way, or even if it’s your first time, we recommend calling a professional to handle this method.
If you are qualified and comfortable using this method, follow these steps:
1. First, make sure you’re wearing safety goggles to protect your eyes.
2. You need to find an air compressor with a volume of 80-100 cubic feet per minute. You may have to rent a machine, as most home compressors won’t reach this kind of level.
3. Next, after your water is shut off, you need to connect the compressor to your sprinkler system using the hose bib or coupler. Be careful not to blow air through the backflow device as this could damage it.
4. Now, you need to find the sprinkler station that’s the highest and furthest away from the compressor and switch it on.
5. Next, you need to close the backflow isolation valves.
6. Slowly and carefully open the compressor valve — this will start releasing air into the system. Make sure no one is standing near the open sprinkler station.

7. Gradually release more air into the system, but don’t release too much at once or else you could damage it. Keep going until you see water start to come through. Take care not to exceed the maximum recommended pressure for your sprinkler system; refer to your manual for guidance. Generally speaking, don’t go above 80 PSI on PVC piping or 50 PSI for polyethylene piping.
8. Once the water stops spraying, switch off the compressor. Starting from the farthest sprinkler station and working your way back to the compressor, you’re going to open each sprinkler head in turn, and then shut it off once the water stops spraying from it. Remember to shut off the compressor between each station switch. Work through them quickly but carefully — you don’t want compressed air blowing through dry pipes for any longer than necessary.
9. Once each sprinkler station is clear, switch off and disconnect the compressor.
10. Now, release any remaining pressure in your sprinkler system using the valves on the backflow device, or via the manual drain valve. Be sure to close the valves again afterwards.
Whichever method you choose, your sprinkler system should now be fully drained — now you’re ready to insulate.
This final step is simple: you’re going to want to insulate any exposed components. This means everything should be covered in insulation foam or tape, including the water supply shut-off valve, backflow preventers as well as any exposed pipes. Just be careful not to block any vents or drains on the backflow preventers. If you don't have insulation foam to hand, we recommend Frost King FV30 Foam and Foil Pipe Insulation ($15 at Amazon).
That’s it, your sprinkler system is now all set for winter. Come spring, it will be up and running again ready to revive your lawn and flowerbeds.